If you hatch your eggs in an incubator, or if you order chicks, you will need a chick brooder to house the little ones. Many use big Rubbermaid containers from Walmart. Cardboard works, but beware of fires when you add heat. Commercial metal and plastic brooders are available for large scale operations. Any sort of container that blocks the wind, offers protection from predators or pets in the house, and allows chicks to get both to and away from the heat source can work. Chicks also need sturdy footing, so thick pine shavings can make a great bedding for a chick brooder. Sand, towels, pet pee pads, dirt, and pressed pine are all other options that can be used. Each bedding type has pros and cons, so be sure to read up on what might suit your farm the best.
CHICKS need HEAT, FOOD, WATER, and a CLEAN, SAFE ENVIRONMENT
Next, chicks need a heat source. Day old chicks will quickly succumb if they don’t have heat. They also need to be able to get away from the heat source if they get too warm. Heat shelves and heat lamps are the most common heat sources for brooders. You can buy a brooder shelf or make one. Below you will see a large rubbermaid container with homemade brooder shelves made out of wire computer shelves, heating pads (make sure they do not have an automatic off), and vinyl tablecloths. If you make one, it needs to be secured so chicks do not get wedged behind the shelf. You can push pine shavings down between the wall and the back of the heating pad so chicks cannot go around and get stuck. Keep heating pads on high for the first 7-10 days, then down to medium for a week or two, then low until they are ready to come off the heat. Lower down you will see more info about positioning the heating pad.
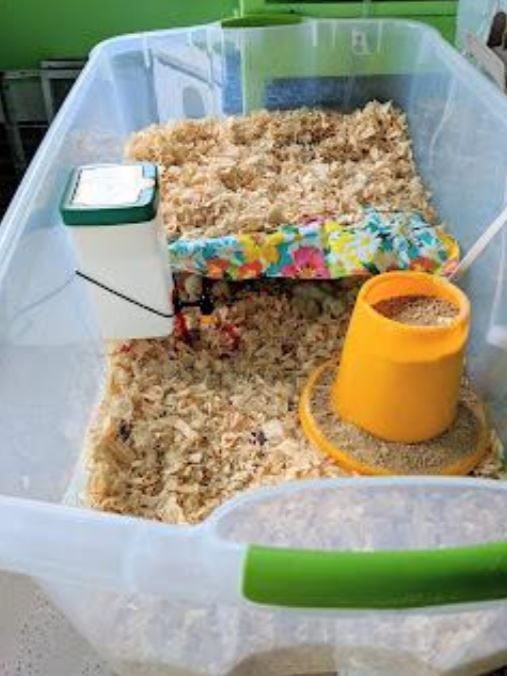
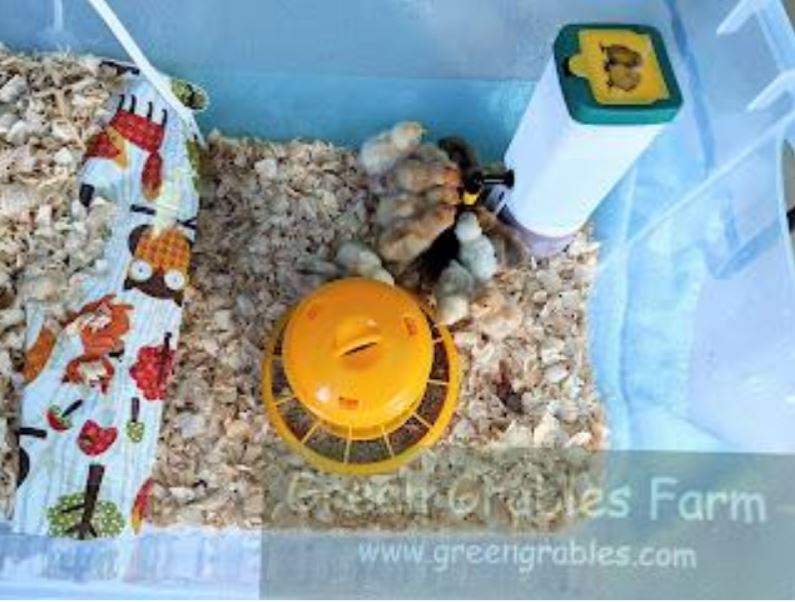
Here you can see the heat shelf in the back, lined with a piece of vinyl cut out from a vinyl tablecloth. A nipple waterer was chosen for water and the chicks have easy access to food.
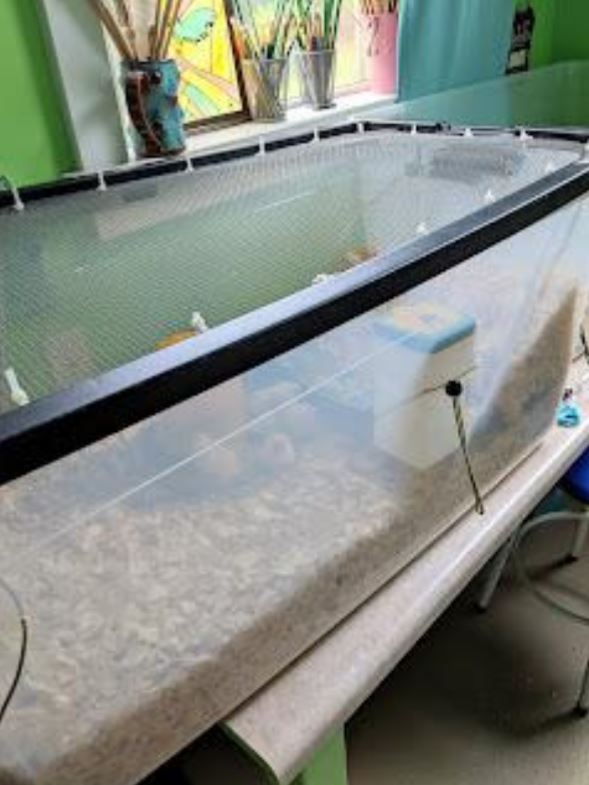
Chicks quickly begin to run around, and escape artists soon begin to explore. Here, a hole was cut out of the lid, and ¼ inch hardware cloth was attached using zip ties for the chick brooder.
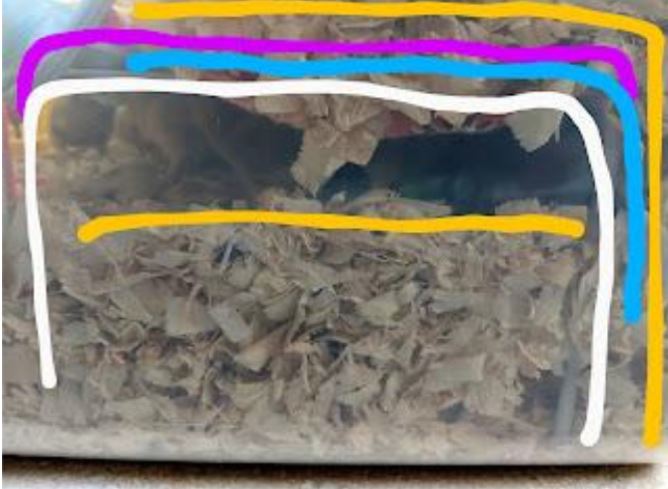
Here is a diagram of the homemade heat shelf. Wire shelf (white), heating pad (blue), vinyl tablecloth (purple), pine chips (yellow). The bottom pine shavings are deep enough so that when the chicks enter the cave, they can lean against the heating pad on the rear wall or enjoy the heat from the ceiling section. As the chicks age, pine shavings can be removed to allow for more room for bigger chicks.

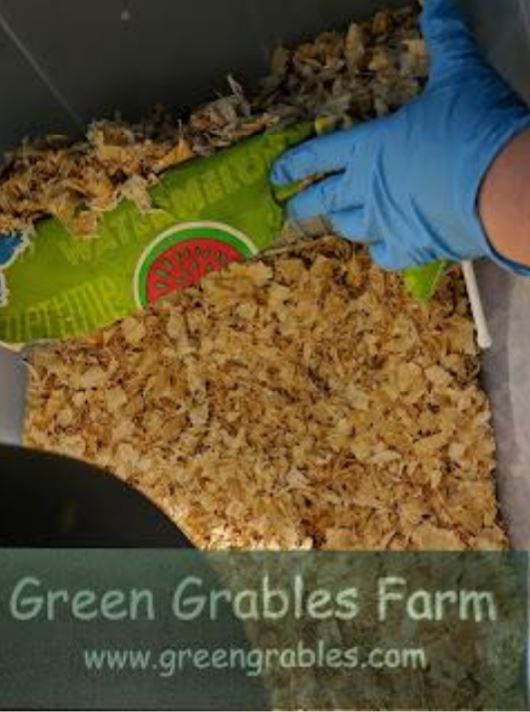
With a homemade heat shelf, make sure the heating pad hangs down in back so the chicks can snuggle into it. Tuck it down into the bedding so chicks don’t get stuck behind it. It only goes halfway across the top of the shelf, which is fine – the chicks all snuggle into it at the back. Put a piece of vinyl tablecloth across the top to completely cover the wire. This keeps feet from getting caught when they get old enough to jump on top, and provides easier cleaning. If the vinyl gets too dirty, it can be replaced with a fresh piece.
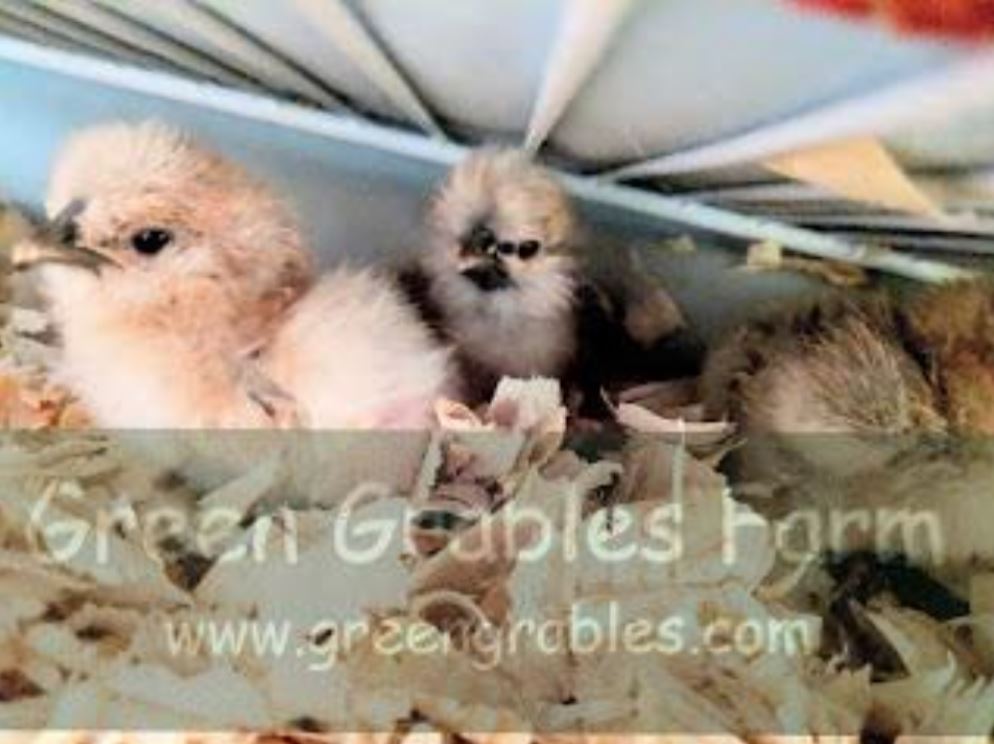
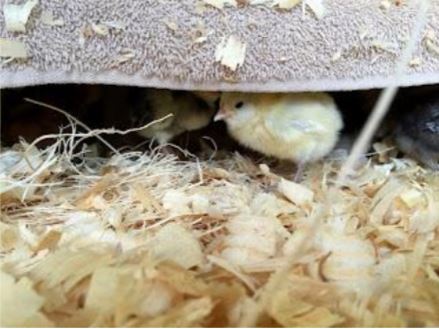
Here you can see the proper height for newly hatched chicks. They scoot around underneath. When first hatched, carefully place them at the back against the heating pad. Build up the bedding so that they can get to the heat.
Heat lamps must be used CAREFULLY as they can start fires. Some people use a heat lamp on day one to maintain a temperature around 95 degrees as the chicks dry out, then switch to a heat plate. This is also helpful for the first day or so with shipped chicks so that you can quickly spot any problems. (* for shipped chicks – give them immediate access to water with chick electrolytes or nutradrench – this will help them recover much more quickly. Show each chick the water by dipping their beak or tapping their beak against the water nipple as you put them into the brooder if they were shipped.) If you hatched them yourself, just put the water in the brooder and they will typically discover it. Marbles in the waterer can help keep young chicks from drowning if you don’t use a nipple waterer.
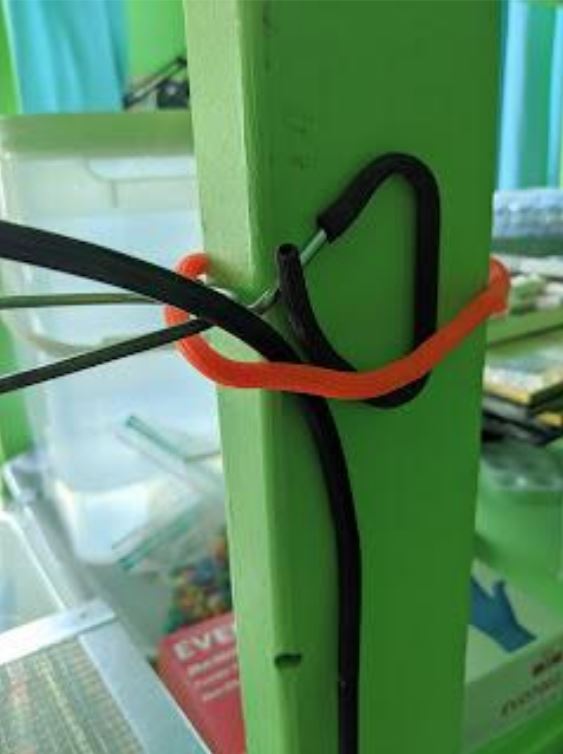
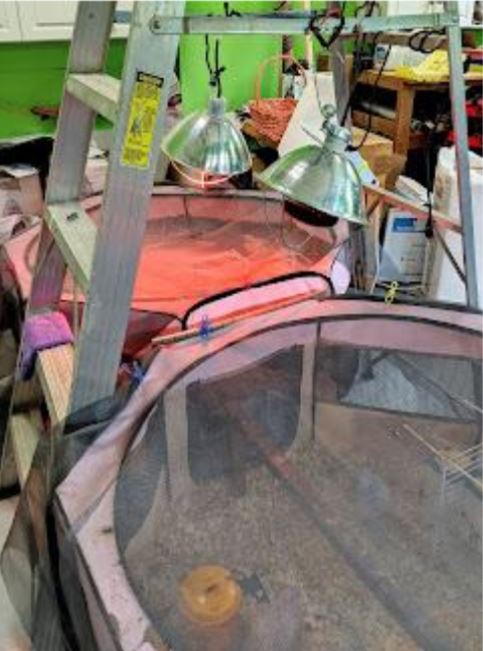
Secure your heat lamps if you use them. The clamp is not enough. Make sure to secure the cord away from the lamp also. ***MAKE SURE YOUR BROODER IS BIG ENOUGH THAT CHICKS CAN GET AWAY FROM THE HEAT LAMP IF YOU USE ONE. THEY CAN OVERHEAT IF THEY CAN’T GET TO COOLER AREAS.***
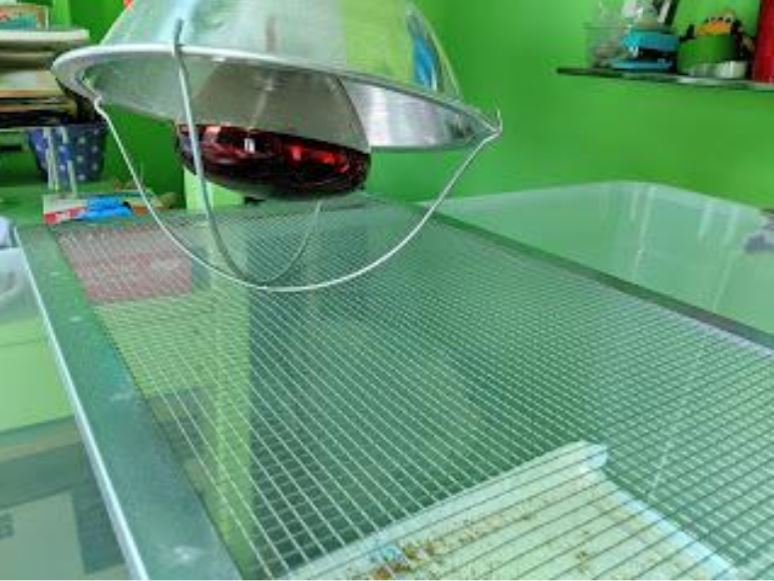
A metal grate below a heat lamp gives extra protection so that the lamp cannot fall.

For the first couple of days, make sure to keep food and water close to the heat source so the babies don’t have to go far to find them. Chick nipple waterers can help keep the water clean. Traditional chick watering systems are often just fine, but require changing several times a day. Top loading feeders make it easy to add more food, although other types of feeders also work well.
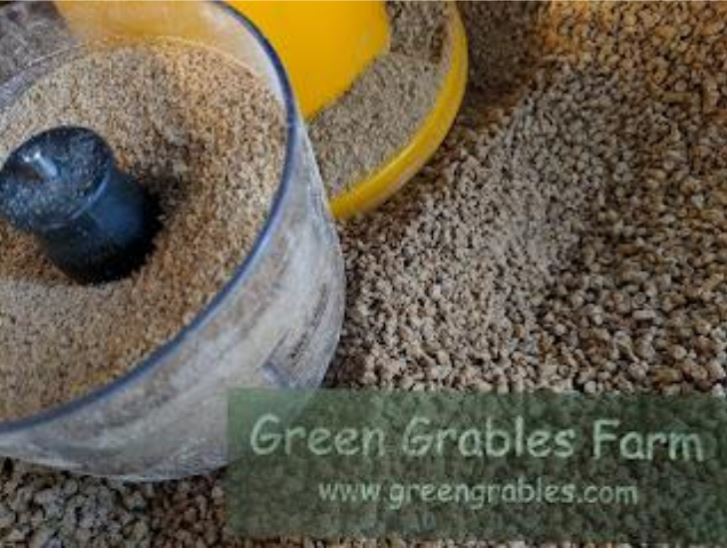
If you raise bantams, they may benefit from grinding chick crumble in a food processor for the first week or two. Large fowl chicks do not need this extra step. Bantams also often benefit from non-medicated food. Medicated feed contains amprolium, which blocks the absorption of thiamine, a necessary B vitamin. Bantams are particularly susceptible to thiamine deficiency, so use medicated feed with caution, and consider a weekly or biweekly vitamin in their water. For a natural introduction to cocci, at about 2 weeks of age you can start adding a tsp of dirt from their future home, sprinkling it across their bedding every couple of days. Do not use wet dirt – only dry, since cocci thrive in wet dirt. You are trying to build up their immunity slowly. Most people do use medicated food, and it should work fine for your chicks. Medicated food is the food of choice when your birds go onto dirt, especially if it is wet and humid.
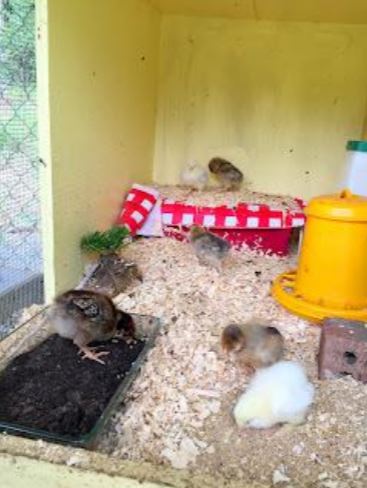
As the chicks grow, the water and food are placed further away from the heat source.This allows for exercise and lets you see and enjoy them when they come out to eat!
Brooders should be cleaned daily. Scoop out the top layer under the shelf or sleeping area to get out the poop. Ammonia from the poop can harm the lungs of the chicks. About every 1-2 weeks, depending on the age and the number of chicks, you can completely clean out the brooder.
Provide lots of room and activities for chicks to keep them occupied, this will keep their stress levels down and keep them from pecking each other. Clumps of grass and soil, dishes of dirt, roosts, and corners with a pile of food for digging can all help keep picking and fights to a minimum.
As chicks can quickly outgrow their first chick brooder, grow out pens and puppy pens can allow more room for active babies. Again, secure heat lamps if you use them, since they are a fire hazard.
Chicks should not be moved into a flock of large chickens until they are near the size of the older birds. Moving day will go much more smoothly if the chicks and adults can see each other through wire beforehand. The day will also go more smoothly if you change things up on moving day, using branches, stumps, cement block, etc. to provide new hiding places for the younger crew. Provide multiple feeding and watering stations, and supervise closely when the juveniles are introduced. Then sit back and enjoy the fun!
Heidi
Green Grables Farm, Raleigh, North Carolina
Instagram: @greengrables
Facebook: www.facebook.com/greengrables
Website: www.greengrables.com
